


Over the past nine months, the world has changed dramatically. The impact on our industry, the nightlife sector, has been huge – here in the UK clubs remain closed for the foreseeable future as the social distancing measures that are in place to protect us limit our ability to gather and party. The “lockdown” has forced DJs across the world to find new ways to share their vibe, and live streaming has become the choice for many.
Live streaming has been with us for a while now. There are a number of channels, such as Facebook, Twitch, Insta, Youtube and Mixcloud which offer users the capability to go “live”. While the dance floors might be empty in the real world, digitally they’re just as busy as ever if you know where to look!
It’s never been easier to live stream; a mobile phone or tablet and a decent internet connection is all you need at a basic level. For DJs playing music and hoping to bring the vibe of the dance floor to others, this offers a simple way to share music. Sadly, the onboard microphone on your device isn’t going to cut it when it comes to capturing your set, although it might pick up the washing machine that’s on in the other room as well as the music you’re playing.
 With so many DJs having access to the entry level equipment required to stream our timelines are now filled with DJs going live. Facebook live streaming is the best way to reach the widest audience, as Facebook is the largest social media platform. If you want to stand out in the crowd, you’ll need to do everything right, having the best selection of music alone isn’t going to help. You’ll need to present your live set in the best way possible, from improving the audio quality through to getting the visuals right – this guide to live streaming aims to help you get out in front.
Please note that while this guide focuses on live streaming over Facebook, many of the tips provided here will work for the other platforms.
Go Live using your phone.
Most Facebook Live users will start out using just their phone or tablet, it’s a great way to get a feel for the reach and interaction you can expect. These devices can provide solid sound quality in addition to great visuals if you use the right kit. A mobile phone and decent audio setup will allow you to take your mixes further. You could find yourself broadcasting from a festival stage post “lockdown” if you’re fortunate enough to get these opportunities. Equally, while we’re all stuck indoors you could stream from somewhere in the garden – this is probably preferable to taking your laptop and associated kit outside to stream you BBQ sessions, given how unpredictable the weather can be.
Using TRRS male to TRS Female adaptors for streaming.
The simplest way to improve your audio quality is to purchase a TRRS male to TRS female adaptor such as the Rode SC4 or Moving Mic MMSC4. These cables connect to the jack input on your device (or a connector if required). You can then connect a twin RCA to mini-jack (3.5mm) cable to the adaptor and you’re ready to stream.
Don’t panic if the kit you use only has one master output, even controllers such as the DDJ-400 and DDJ-SB3 from Pioneer DJ, Numark’s Mixtrack Pro FX or the Traktor S2 can be connected without interrupting your usual setup by using a QTX stackable cable. The QTX stackable cable splits the connections at one end allowing you to connect this end to your master output and the feed for the adaptor.
With the adaptor connected, and audio supplied from your master output, your device will assume that there is a microphone connected and you will have improved your audio quality. We should add a word of warning at this point – as your device is now amplifying what it believes is a microphone, you will need to watch your levels carefully. This is especially important when you have two tracks in the mix – it’s very easy to distort the signal considerably if you’re not careful.
A more expensive option for TRRS to TRS conversion is the IK Multimedia Irig 2. The benefit of this device is gain control and a handy through connection which can save you splitting the audio signal using a stackable cable – a pair of simple Y connectors are all you need to add this into your master output feed. The gain control will help you with signal level issues to some extent, but you’ll still need to keep an eye on things.
iOS Audio Interfaces for streaming.
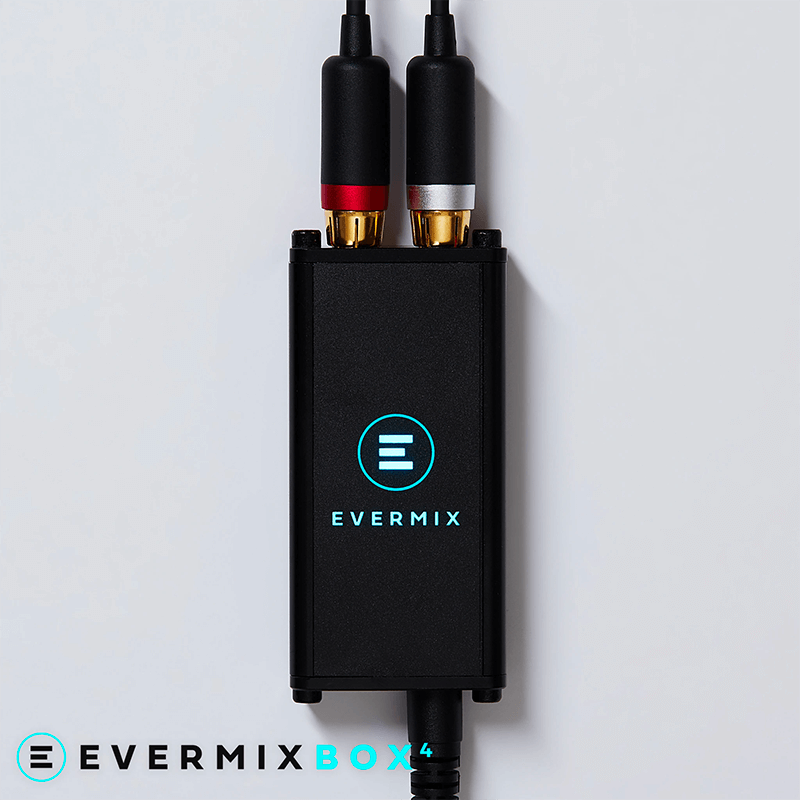
If you’d prefer to get the very best audio quality into your iPhone, iPad or Android device, then the Evermix Mixbox 4 is the interface you need. It connects to your device via the lightning socket and can also charge your device while you’re streaming so battery life isn’t an issue. There’s no through option, so if you’re using a mixer or controller that doesn’t offer multiple outputs the you’ll need the QTX stackable cables or RCA splitters.
This premium device has been designed with one goal, to get your DJ set into your iOS device. Key features of the Mixbox 4 which help to achieve this goal are built in attenuation, which keeps the signal level in check, and the superior analogue to digital conversion.
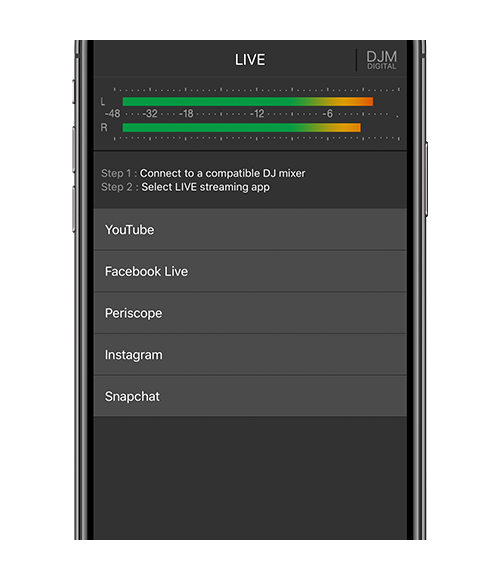
DJM-REC iOS app for streaming.
If you own a Pioneer DJ DJM-V10, DJM-900NXS2, DJM-750MK2 or DJM-450 you can stream via the Pioneer DJ DJM-REC application for iOS. Simply install the application onto your iPad or iPhone and simply connect to your mixer (just a quick note, you may need to perform a firmware update on the mixer to enable this). While the app is primarily designed for set recording, there are comprehensive streaming options. This includes the capability to output video and pristine audio through your iOS device to Facebook Live, Youtube and more.
Over recent months we’ve spotted a few a-list DJs from various genres making use of this handy feature. DJM-REC has the added benefit of enabling live streaming when you’re playing out at festivals or the club, internet connection providing of course, so expect to see more sets from the booth making use of this app in the future.
Facebook live streaming with OBS.
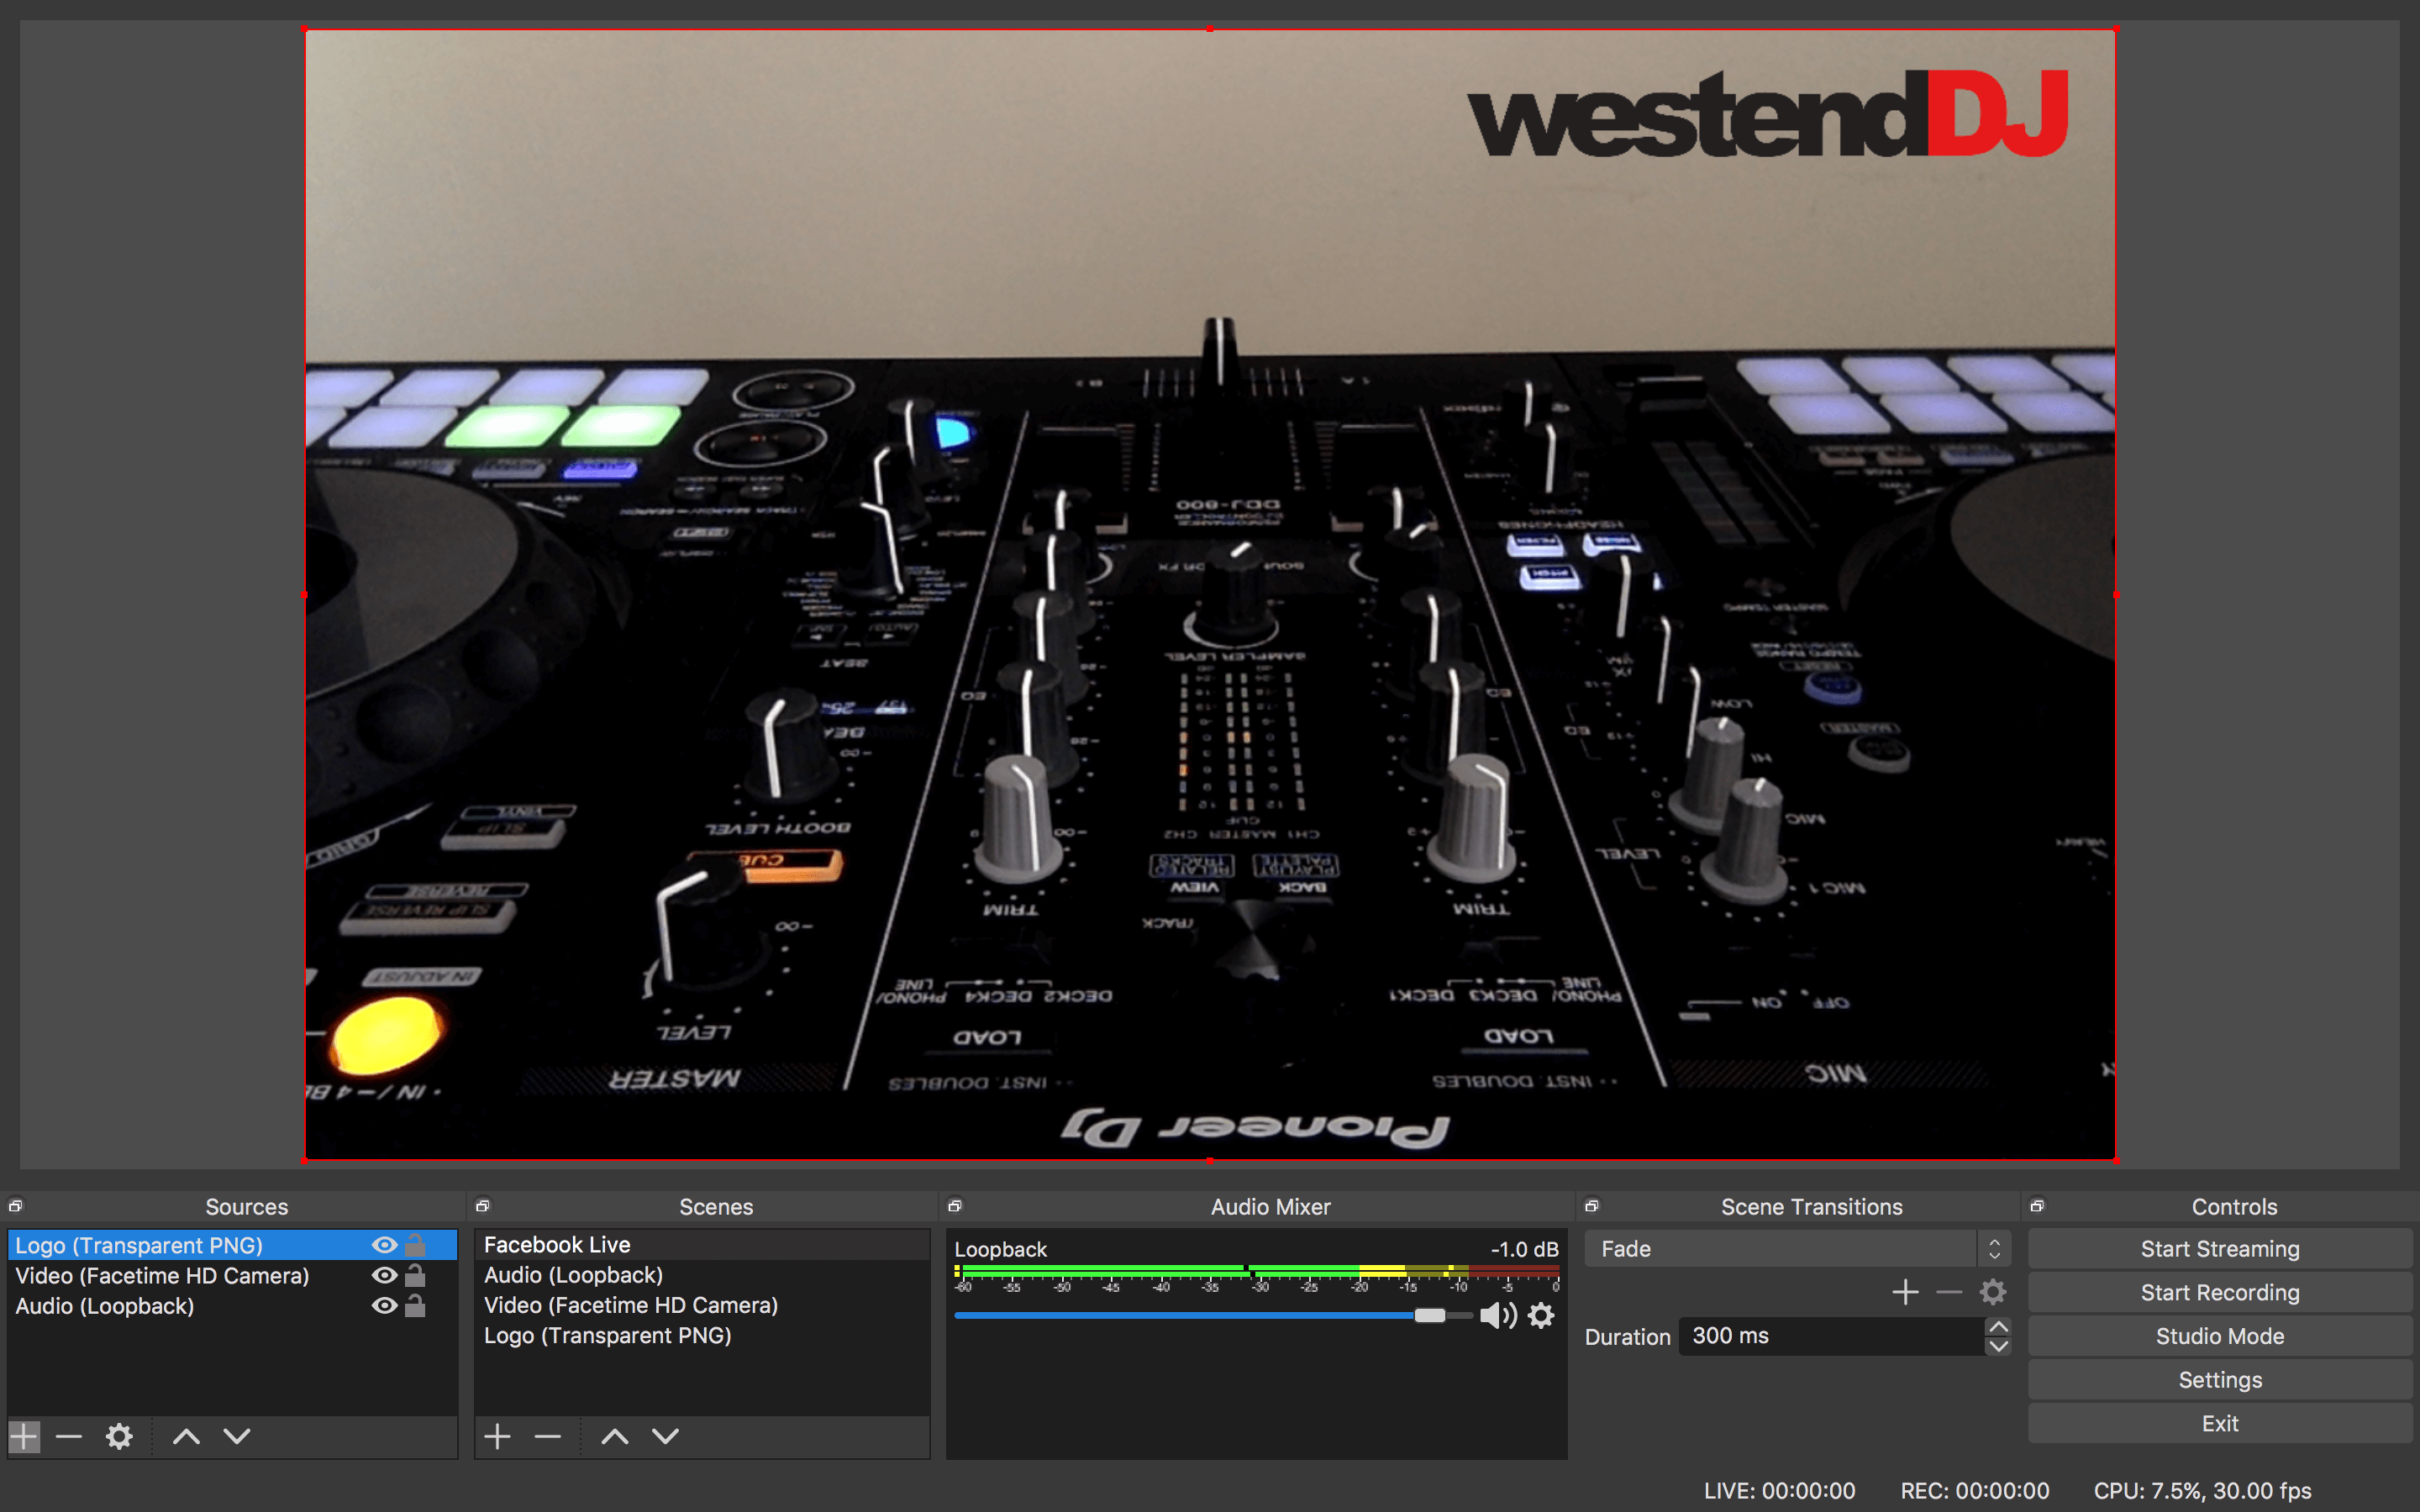
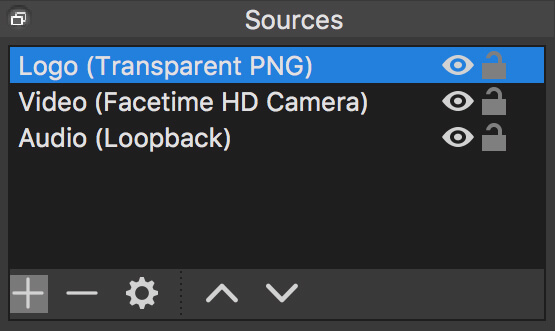
OBS is a great piece of free software that unlocks the world of streaming with ease. To download the latest version head over to the OBS site. Adding great audio to your feed is simple, connect any good quality audio interface to your Mac or PC and follow the simple steps that follow below. When you’ve followed this guide your OBS project should look like this:
If you use a mixer with a USB output, you can connect directly to your computer and choose this as the input feed for your stream. We’ve tried this with a number of mixers in this way including the Pioneer DJ DJM-900NXS2, Denon DJ X1800 (we’re assured that the new X1850 will also work) and Xone 43C and had some great results. Pretty much any mixer with a USB interface built in will work but do remember that if you’re using this for DVS then you’ll need a different setup for streaming.
Please note that at the moment the output routing of the Xone 96 causes some issues with OBS but we’re looking for a workaround.
Adding an audio source in OBS.
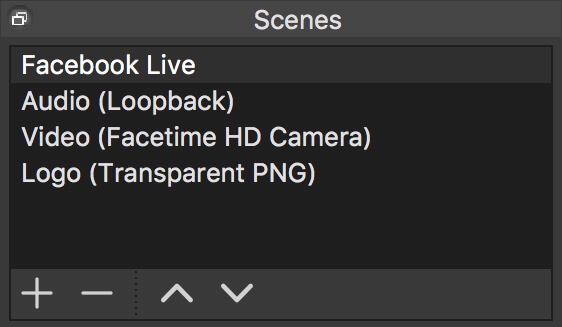
Let’s assume you’re starting from scratch. Create a scene for your project – simply click the + at the bottom of the source box. Give this a name to help identify it, such as Facebook Live. Now do the same thing again, this time we’ll name this scene “Audio” to keep track of things. We can use scenes in OBS like layers in photoshop or tracks in a DAW thanks to the ability to utilise the scene as a source. This way each scene handles a different element of your output stream, whether this is a video feed, an audio feed or a logo/image overlay.
 To add an audio source, click the + at the bottom of the source box and choose audio input capture. You’ll then be presented with the option to choose your audio interface/mixer from the drop down. To test that this is working play something through the mixer, and you should see the level in the meters on screen.
 To help keep your levels in check we’d suggest that you set your mixer volume so that your output levels are just causing the first red light to flicker. Next, adjust the gain in OBS until the red clip indicator is visible and then knock the gain back on the mixer so that the red led no longer flickers. Now you’ll get a decent signal level without clipping and distortion.
Now navigate to the Facebook Live scene and add the audio scene as a source (add the source by clicking the + and choose scene, you’ll then see that the “Audio” is available as a source – this is one of the key features that makes OBS so powerful).
Virtual Cables for DJ Controller Streaming.
Virtual cables/virtual audio routing drivers allow for routing of audio within your Mac or PC – popular choices include Soundflower, Loopback, Blackhole and VB-Cable. This can be useful if you don’t have an audio interface to capture your output from a controller, or a second PC or Mac to use for streaming duties.
We’ll show you how to set up a virtual source for Rekordbox but the process is the same if you’re using Serato DJ or Traktor with a controller. You can also use Loopback to combine other signals, such as a USB microphone into one stream that you can feed into OBS for simple streaming.
Step 1. Open your DJ software, in this case we’re using rekordbox.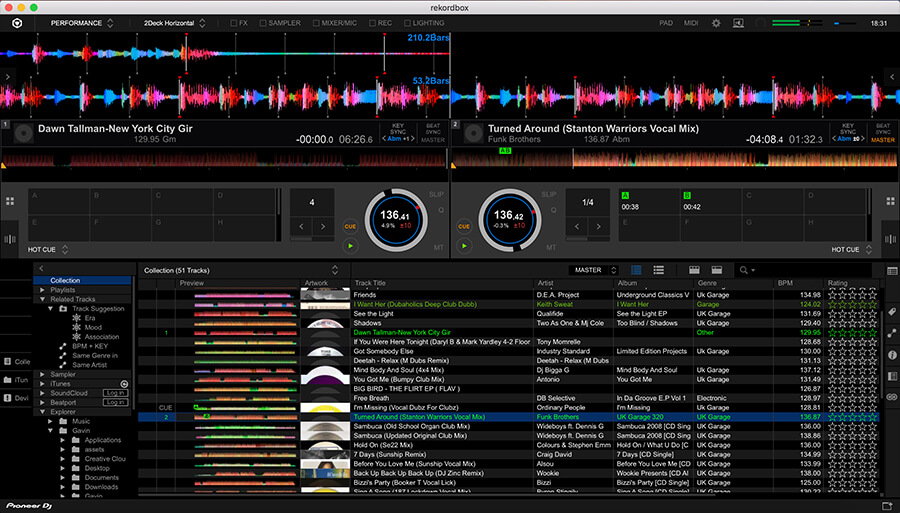
Step 2. Open the loopback application, it should look like this. Step 3. You’ve probably noticed that you now have no output from your controller. This is because Loopback mutes the playing source. To fix this simply click on the options below the Rekordbox audio source and uncheck the “Mute when capturing” box (as displayed in the image above).
Step 4. Open OBS, follow the same steps for adding an audio interface but this time choose “Loopback” as the audio input capture source.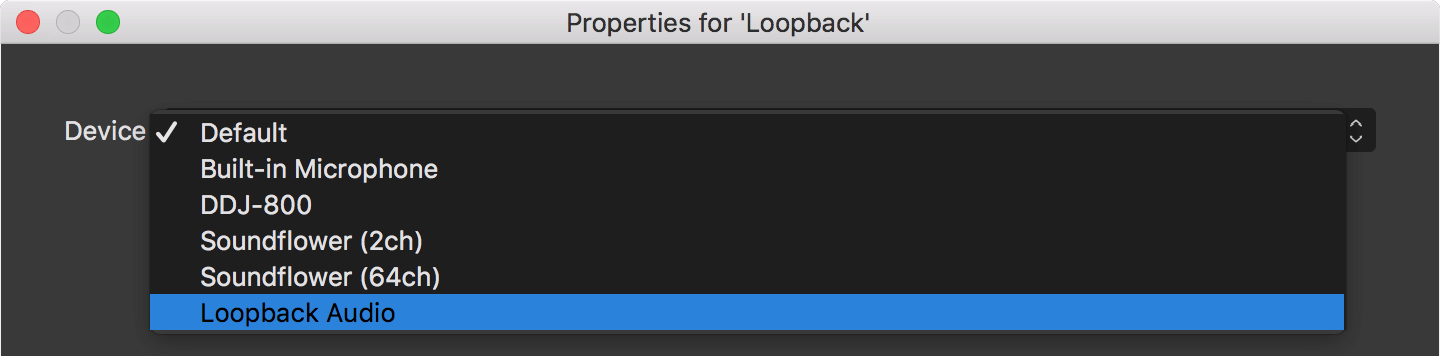
 Quick Tip
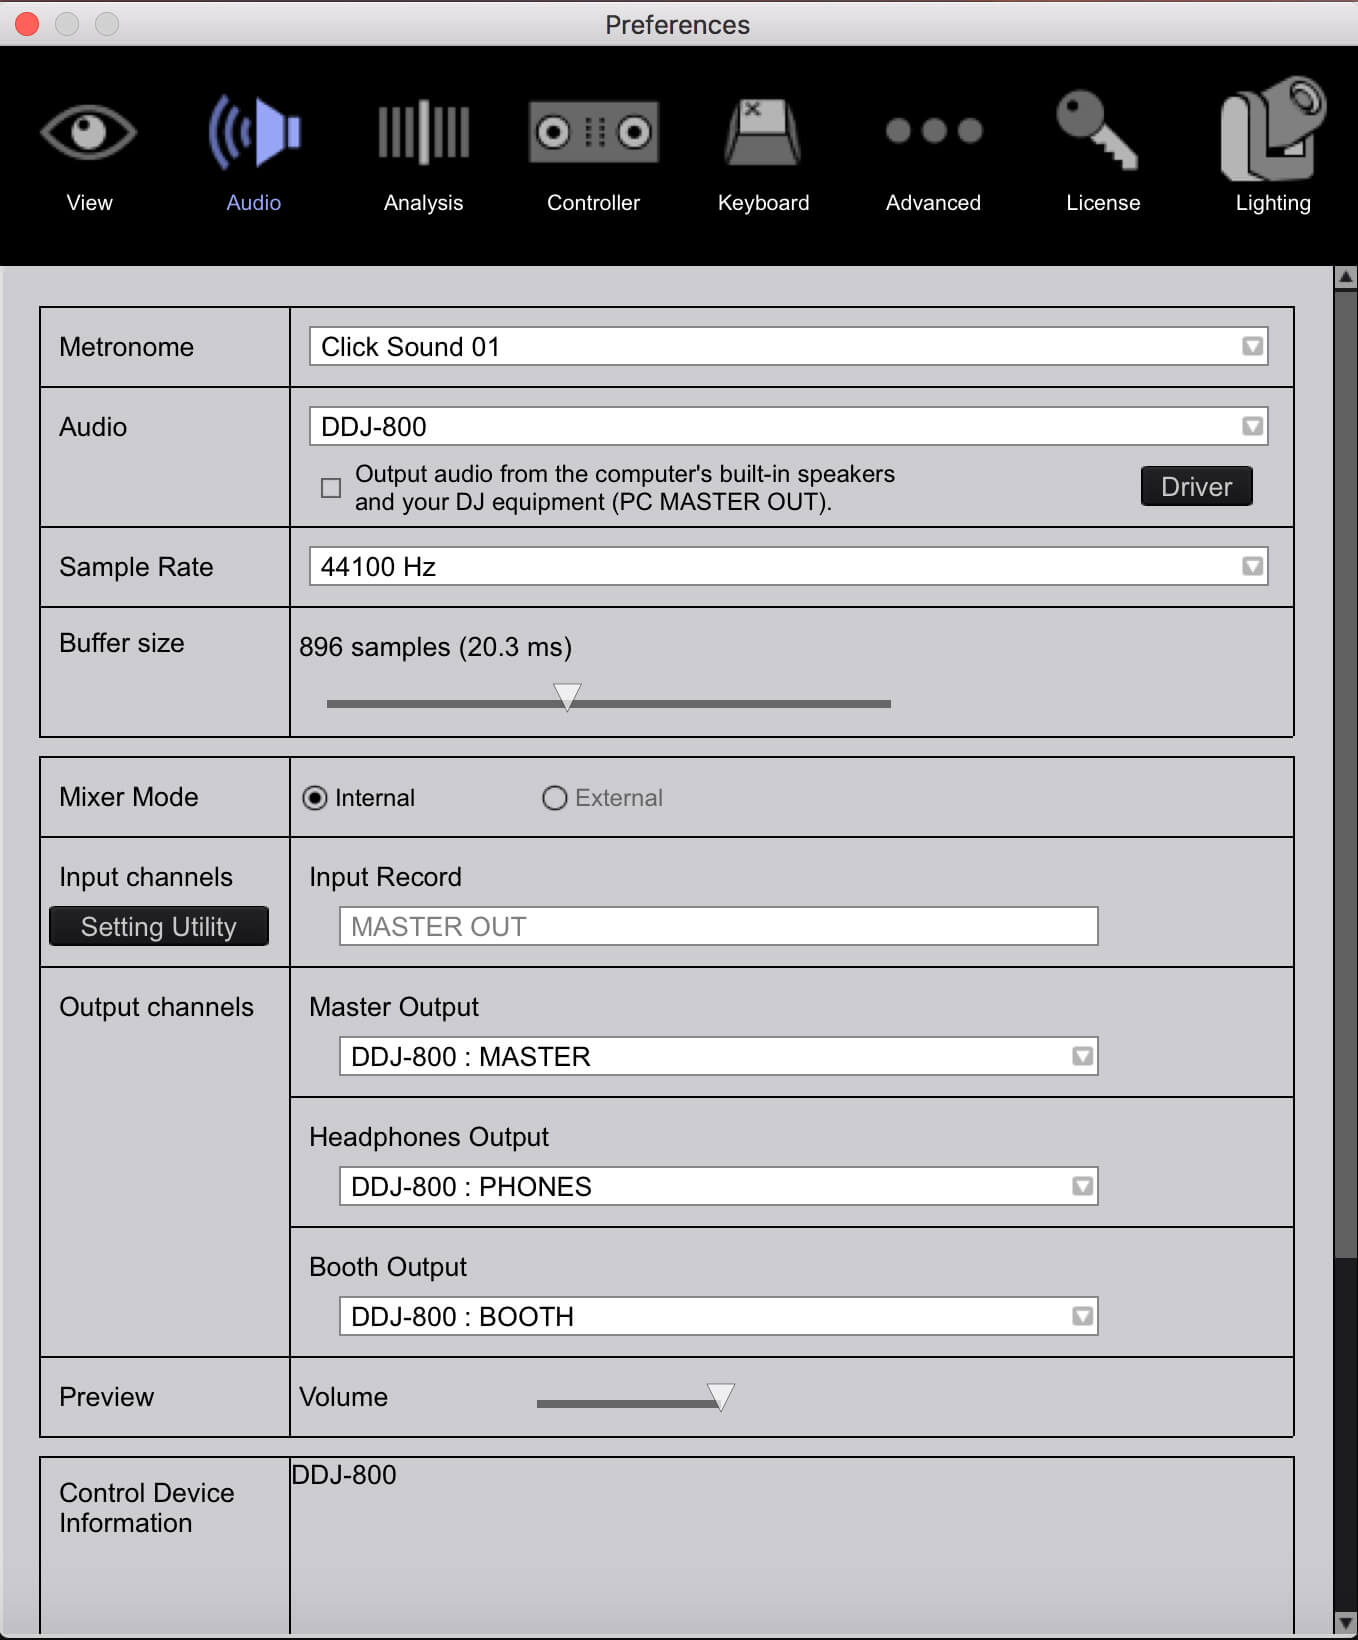
Looping back the audio, running Rekordbox and OBS will strain the processing capabilities of all but the latest Mac and PC computers. If you notice audio drop out the quickest fix is to edit your buffer size to improve audio performance. Increase the buffer size until the audio plays correctly. Remember, the bigger the buffer size, the greater the latency – if you push this to high you might notice a delay when playing.
Adding video sources and image overlays.
After you’ve added your audio scene you can then add your video sources. OBS will allow you to add more than one video source within a scene, but we’d suggest that you create one per source, so if you’d like to jump between cameras for different angles this is easily achieved. If you don’t have external cameras, you’ll be able to choose the webcam in your laptop if it has one – you’ll be surprised at the video quality that can be achieved. The HD Facetime cameras in the MacBook range deliver some great results when used with OBS – but try to ensure that the area is well lit.
To create a video scene simply add a scene as before, name this “Video” (or “Video One” if you’re going to be adding more video feeds) and choose video in the source box. Then choose the video source from the dropdown menu that appears next. If you’re using just one camera, such as the built-in webcam, then this should be straightforward enough. If you are using multiple webcams that are the same model, it might take some to work out which camera suits best as your main feed.
As before, add the “Video” scene as a source to the Facebook Live scene by using the scene as a source option. Repeat this step for each video feed. If you’d prefer to use a picture in picture (PIP) setup then drag the sources into the correct order (with the main video feed at the bottom) and then use the red box around the selected video source to resize the feed. You can then drag the PIP into a suitable place (more on suitable positioning in a moment).
Image overlays, such as logos, are simple to add. Again, create and name a scene first – for this example we’ll name the scene as “Logo”. In the source box add an image and then navigate to the store file when you’re present with the option. If your image has transparency settings (such as a frame overlay or logo) then video will be visible through the areas when no image is seen. PNG files are usually best used for logos as they preserve the transparency.
Now we’ll prepare to stream via Facebook Live.
OBS Facebook Live configuration.
Facebook are constantly revising the layout of the platform; the following is based on the latest version as at 23/07/2020.
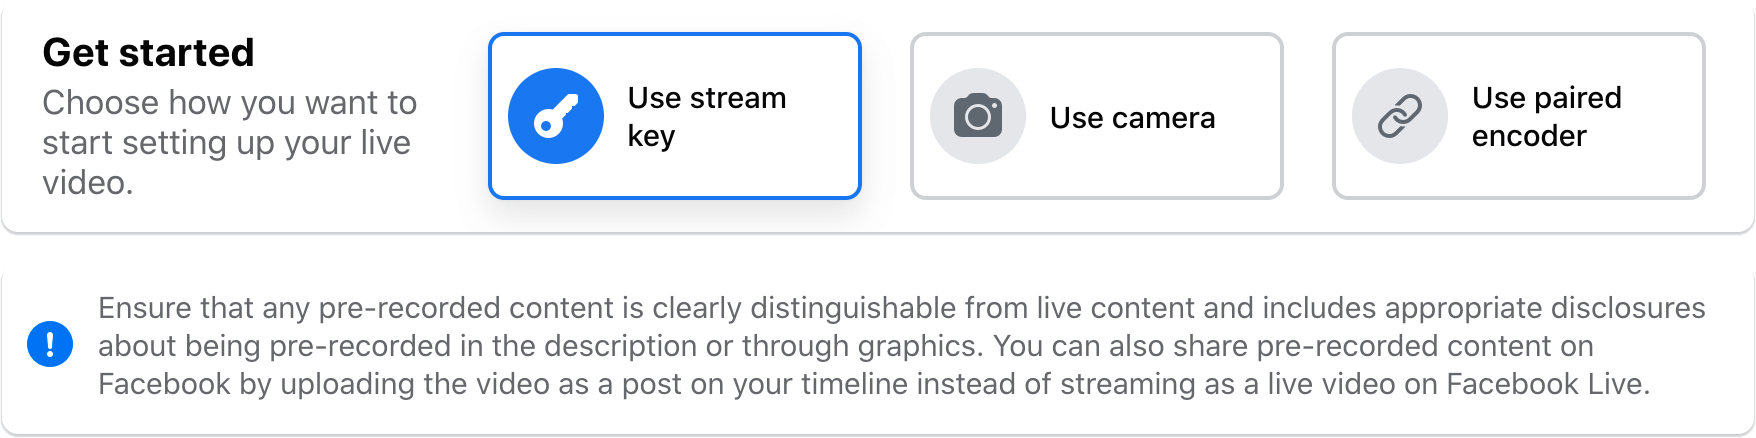
First up, head over to Facebook. Create a post and then choose live video as an option.
You’ll be presented with some options and you need to go live using the “stream key option”.
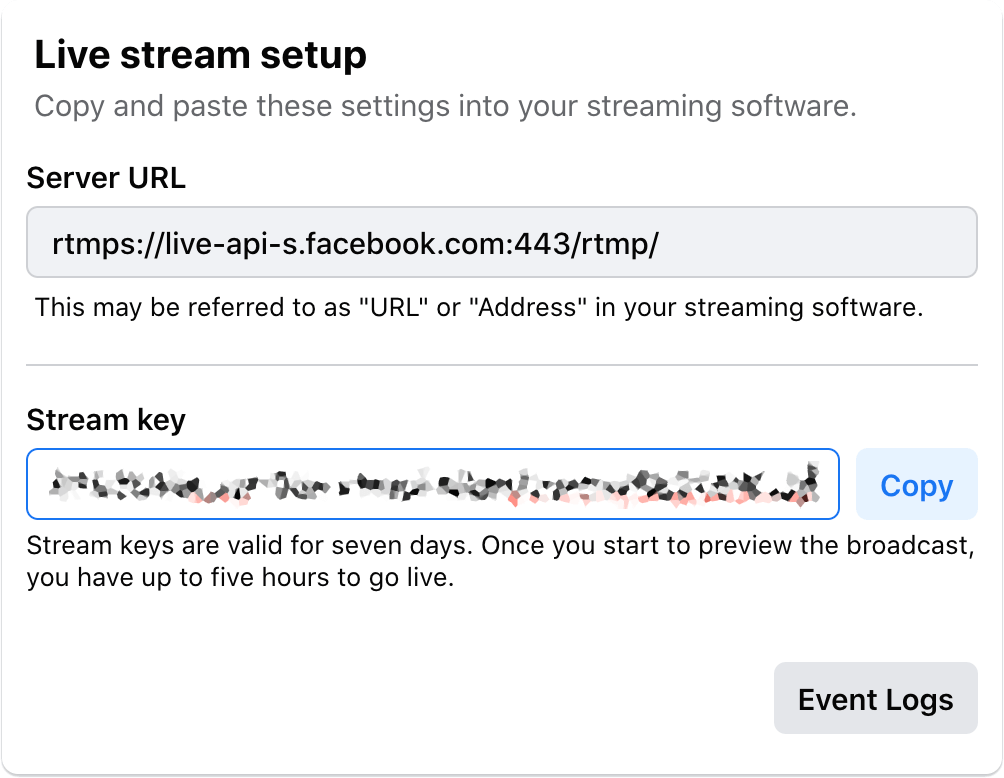
 Copy the stream key using the handy button next to the string of numbers and letters:
These same options are available if you’re streaming via a page.
Now head over to OBS and open the settings, make your way to the streams tab. From the first dropdown choose streaming services if this isn’t already visible. Now choose Facebook Live from the second dropdown. Next, paste the stream key into the field.
Close the settings and click “start streaming”. Play a quick test track from your source device and you should see this preview in your browser at Facebook. You can now add additional features such as video title, a description and even tag friends to create an audience.
General Facebook Live DJing tips.
We’ve put together some general tips to help you stand out from the crowd when you livestream.
- Preparation is key and can save you headaches when you’re actually live. First up, unless your following is huge it’s unlikely that you’ll be “white listed” for copyright exemption. With this in mind, we suggest that you broadcast your set to a couple of close friends via a test page that you create and see which tracks will mute your video. Knowing which tracks will cause a copyright issue will help you avoid the dreaded audio mute which will reduce your audience size.
- Consider image overlay/logo placement carefully. Facebook live videos are consumed across a number of differing platforms – from apps on mobile to browsers at various resolutions. As a result, there are various controls and overlays added by the system you need to consider when placing logos and image overlays. As a general rule steer clear of the bottom quarter of the video window (where the progress bar and play controls will obscure content behind them) and the same can be said for the top quarter of the screen (where Facebook will add the live icon and timer).
- Fix up, look sharp. Time spent improving the look of your “studio” will also help your stream stand out. Consider finding a space that isn’t in the kitchen and setting your cameras up to catch as much of you and your set up as possible. If you absolutely have to stream from the kitchen, make sure that you’ve cleaned the dishes and put them away before you go live.
- Interaction is key to holding the attention of your audience. Make sure you have a decent microphone, the Podcast Pro from Sontronics is a great choice as it’s dynamic and be connected directly to any DJ mixer or controller. It looks just like a high-end studio microphone and if you mount it on a swivelling boom arm, you can move it out of shot (or at least out of your face) once you’ve given a shout out to your viewers.
- Tip five ties in with tip one. If you’re using OBS you can create a timed series of “Now Playing” and “Up Next” overlays. You’ll have seen these on MTV and pretty much every other music TV channel and even Youtube makes use of them. This is because it will help you to hold onto your audience – especially if you’re about to play something they love next. To make this work you’ll need to practice your set and recreate it bang on time so that your overlays match the track playing, but it looks far more professional. If you don’t have time to put this together, you should still communicate this information pirate radio style and use the mic!
Back to basics – setting up your audio outputs correctly.
Our final piece of advice is to set your audio output up correctly. This might seem like an obvious and simple suggestion, but you would be amazed at how many times we resolve seemingly complex problems for our customers by going back to basics.

Key to setting your audio outputs up is making use of the correct outputs, especially when you’re planning to stream. For mixers and DJ controllers with one master output, the use of splitters or stackable RCA cables will help you route audio to your phone, table or audio interface without complicating the signal path.
If your mixer or DJ controller has a booth output, use it to connect to your speakers! Connecting your monitor speakers to the booth gives you independent volume control, so that you don’t need to fiddle with the levels you’ve carefully set up for streaming. It seems obvious but setting up in this way, as intended by the manufacturer, will help you improve your audio quality for Facebook Live dramatically.
Streaming to multiple platforms from one instance of OBS.
We’re often asked if it’s possible to stream to a number of platforms simultaneously, which of course is a great way to improve your reach. For a fast and simple way to stream to multiple platforms at once we’d recommend restream.io
So, there you have it, the Westend DJ guide to Facebook Live streaming for DJs – if you have any questions or think we’ve missed anything out, drop us a comment below and we’ll get back to you asap.


